Here i am publishing that, what ever i feel beautiful....and useful for the blog readers....

Friday, August 31, 2012

Extension tubes magic


This week end my fotogs met in the public garden to do some experiments
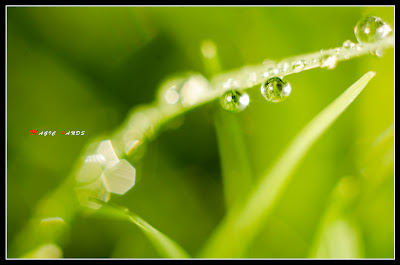
i was so happy to get a chance to try my normal extension tubes with the 50 mm prime lens. the day was great we did lots of experiments. but i like the shots i shoot with my 50 mm with the extension tubes. check the images i got water droplets on the carpet grass... my macro works well...:P
Hand held shot 3 rings extn tubes together all manual settings with out flash @ day light

soap bubble experiment had tried lots coz when ever the bubble reaches ground its blasting....
so.. we are in the reflection.
its the carpet lawn...
if someone wants the fully automated one, then they can go for Kenko extension tubes . one of the third party tubes the professionals like it will cost around  80-100 $

water drops like dews...
the extension tubes are cost less than 10$.. from amazon and e-bay. but it will work all manual settings only.

 
The idea is this
actually it is not not making any ratio increse as the real macro lenses do. it just change the minimum close focus distance. for eg. the 50 mm prime minimum close focus is 30 cm?.. and add the extension tubes will change till 1 cm? :P :P or touching with the subject..
a macro tryout with the 3 tubes 50 mm 1.8, nikon D7000, tripod, shutter release, sb600 flash
The result -  sea snails (size 8 mm)


The main problem is using extension tubes other than a macro lens, we should more patience and stable hand to shoot.
tripod & shutter release are preferable for most of the shots.
loads loads loads of patients needed to shoot because we need to move front and back to get proper focus.
aperture value will be zero.
a bee shoot
so dont think about aperture. always work with manual mode only. and better not to go with auto extension tubes. it gives me im proper focusing (i tried with my friends kenko automatic tubes with canon 50mm.)
but for the cost we paying for this- its worth it.


one nature shoot from my last vacation to india


red Ant


bush seed 6mm size


Dragon fly head 3 tubes combo
at the end- the experiance is great, worth it for the money- need more patience and loads of clicks to get good one. - at the end macro lens is macro lens.... if u really interested in macro, and you are a canon user- go for MPE 65 macro lens.. have a great macro shooting... cheers...
 

Thursday, August 30, 2012

VRayPhysicalCamera settings

Example 1: exposure control - f-number (f-stop)
Example 2: exposure control - Shutter speed
Example 3: exposure control - Film speed (ISO)
Example 4: Zoom factor
Example 5: Vertical shift (Camera Correction)
Example 6: Distortion
Example 7: Vignetting
Example 8: White balance
Example 9: Depth of Field (DOF)
Example 10: Motion Blur (MB)

Note: All the images are rendered using the VRaySun and VRaySky set with their default parameters.

Example 1: exposure control - f-number (f-stop)

This parameter controls the aperture size of the virtual camera. Lowering the f-number value increases the aperture size and so makes the image brighter, since more light enters the camera. In reverse, increasing the f-number makes the image darker, as the aperture is closed. This parameter also determines the amount of the DOF effect, see Example 9.

Exposure is on, Shutter speed is 60.0, ISO is 200, Vignetting is on, White balance is white.


f-number is 8.0
f-number is 6.0
f-number is 4.0

Example 2: exposure control - Shutter speed

This parameter determines the exposure time for the virtual camera. The longer this time is (small Shutter speed value), the brighter the image would be. In reverese - if the exposure time is shorter (high Shutter speed value), the image would get darker. This parameter also affects the motion blur effect, see Example 10.

Exposure is on, f-number is 8.0, ISO is 200, Vignetting is on, White balance is white.


Shutter speed is 60.0
Shutter speed is 30.0
Shutter speed is 125.0

Example 3: Exposure control: film speed (ISO )

This parameter determines the sensitivity of the film and so the brightness of the image. If the film speed (ISO) is high (film is more sensitive to the light), the image is brighter. Lower ISO values mean that the film is less sensitive and produces a darker image.

Exposure is on, Shutter Speed is 60.0, f-number is 8.0, Vignetting is on, White balance is white.

ISO is 400
ISO is 800
ISO is 1600

Example 4: Zoom factor

This parameter determines the zooming (In and Out) of the final image. It doesn't move the camera forward nor backwards.

Exposure is on, f-number is 8.0, Shutter speed is 60.0, ISO is 200.0, Vignetting is on, White balance is white


Zoom factor is 1.0
Zoom factor is 2.0
Zoom factor is 0.5

Example 5: Vertical shift (Camera Correction)

Using this parameter you can archive the so called "2 point perspective". To have that done automatically, use the Guess vertical shift button.

vertical shift: Guess (2 point)
vertical shift: -0.5
vertical shift: 0.5

Example 6: Distortion

The difference between the two types of distortion is slightly visible. The Cubic type should be used in some camera tracking programs like SynthEyes, Boujou etc.

Distortion is 1.0, Distortion type is Quadratic
Distortion is -1.0, Distortion type is Quadratic
Distortion is 1.0, Distortion type is Cubic
Distortion is -1.0, Distortion type is Cubic

Example 7: Vignetting

This parameter controls the simulating the optical vignetting effect of real-world cameras.

Vignetting is 0.0 (vignetting is disabled)
Vignetting is 1.0

Example 8: White balance


Using the white balance color allows additional modification of the image output. Objects in the scene that have the specified color will appear white in the image. E.g. for daylight scenes this should be peach color to compensate for the color of the sun light etc.

Exposure is on, f-number is 8.0, Shutter speed is 200.0, ISO is 200.0, Vignetting is on

White balance is white (255,255,255)
White balance is blueish (145,65,255)
White balance is peach (20,55,245)

Example 9: Depth Of Field (DOF)

To enable the DOF effect you need to turn on the Depth-of-field option in the Sampling rollout of the physical camera. The effect is most strongly seen when the camera is close to some object, like when doing a "macro" photo. For a strong DOF effect, the camera aperture must be open wide (i.e. small f-number value). That may lead to a very burnt and bright image, so to preserve the same illuminosity over the whole image, the shutter speed must shortened. And at last but not at least the focus distance determines which part of the scene will be actually on focus. To get the focus near, you would need a small value and reverse - higher value for far focus. 

Exposure is on, f-number is 1.0, Shutter speed is 4000.0, ISO is 200.0, Vignetting is on

DOF is off
DOF is on, Focus distance is 400
DOF is on, Focus distance is 4000

Example 10: Motion Blur (MB)

To enable the motion blur effect you need to turn on the Motion blur checkbox in the Sampling rollout of the physical camera. The amount of the motion blur is determined by the speed of the moving object itself as well as the Shutter speed setting of the camera. Long shutter speeds will produce more motion blur, as the movement of the object is tracked over a longer in time. In reverse, short shutter speeds will produce less motion blur effect. Keep in mind that to preserve the same illuminosity over the whole image, the f-number value has to be corrected as well.

Note that in the example the far object is moving quicker than the near one, which cases the difference in the motion blur effects.

Exposure is on, ISO is 200.0, Vignetting is on


Motion blur is off
Motion blur is on, f-number is 16.0, Shutter speed is 30.0
Motion blur is on, f-number is 8.0, Shutter speed is 125.0